Samsung offers some of the most advanced mobile phones on the planet, but even popular models such as the Samsung Galaxy S4, Galaxy Note 3, and Galaxy S III are rendered useless by a cracked screen. A cracked Samsung phone screen can be devastating, especially if you rely on your mobile phone for business, school, and your social life. The following details how to replace a cracked Samsung screen.
Samsung Screen Replacement Options
There are several ways to replace a cracked Samsung cell phone screen. Each option comes with its own pros, cons, and pricing; which is dependent on the type of repair as well as the model. Here are the three primary broken Samsung screen replacement options available:
DIY Samsung Screen Replacement
You can purchase an Samsung screen replacement kit from reliable mobile phone replacement parts suppliers like HCQS. Samsung screen replacement kits typically start at around $100 and can range up to around $250, depending on the model and retailer. Some kits include necessary tools, such as pry tools and suction cups, to help you complete the replacement.
Pros: Replacing your own broken Samsung screen minimizes the amount of time you'll be without a phone and is the most affordable option.
Cons: Replacing your own Samsung phone screen can take several hours, void your warranty, and risk damage to your phone ¨C especially if you're not particularly tech savvy.
Bottom line: Unless you have experience working with delicate electronics, replacing your own Samsung mobile phone screen probably isn't worth the risk.
Manufacturer Cracked Samsung Phone Screen Replacement
If your Samsung phone screen is broken, you can send your phone to Samsung's technicians for repairs. Screen replacement is reported to cost around $150.
Pros: Samsung technicians will not void your warranty and pricing is consistent with DIY Samsung screen replacement.
Cons: The screen replacement process can take several weeks to complete, during which time you'll be without your mobile phone.
Bottom line: Having Samsung replace your damaged screen on-site is a good option, but might not be worth the wait if there are local repair options.
Third-party Cracked Samsung Phone Screen Replacement
You can also opt to have a third-party service replace your cracked Samsung screen. There are three basic types of third-party Samsung service centers:
1. brick and mortar locations in your local area
2. shopping mall kiosks
3.mail-in services
Both brick and mortar locations and shopping mall kiosks feature quick turnaround times, though mail-in Samsung phone screen replacement services can take several weeks to return your device. Pricing varies by service and model, and can range anywhere from $150 to $310.
Pros: Fast turnaround for kiosks and brick and mortar service centers.
Cons: Mail-in services can take several weeks, during which time you'll be without your Samsung phone, and third-party services can be more expensive than Samsung's own cracked screen replacement service.
Bottom line: Do your homework, as not all Samsung phone screen replacement services are created equal. Make sure the repair service you select does not void your warranty and guarantees its work. Shop around for the best price and turnaround time.
For some, replacing your own cracked Samsung phone screen might be the cheapest and quickest option; for others, having Samsung or a third-party professional screen replacement service might make the most sense. You can additionally opt to sell your broken Samsung phone toward the purchase of a new model. Ultimately, it's up to you to determine which Samsung cracked phone screen replacement option is best for your specific situation.
Thursday, January 28, 2016
Wednesday, January 27, 2016
Why Does My iPhone Work improperly after Screen Replacement?
Replacing your iPhone screen by yourself is the cheapest way to repair your broken screen since you won’t have to pay a service charge. However, if you are unfamiliar with the procedure then something may go wrong. In our latest installment of our iPhone troubleshooting series we will discuss some common issues after screen replacement.
1. Blue/Black Bars, Half An Image, Or No Image:
This is normally a sign of your LCD cable not being plugged in correctly. Reattempt the repair from the beginning. At the point where you plug in your new screen to your main board, check both your connector plugs, and verify that none of the pins are bent or missing. If the pins are damaged, plugging in your new screen again will not solve the problem. You will need to bend the pins back into place before your device will start working again. Once the pins are straight, and the screen is plugged in again, try powering on your device without closing it up. This will allow you to troubleshoot your repair without the need to remove every screw all over again.
If your device is still (or is just now) showing no image, but there is a glow from the back light, follow these steps:
1.Unplug your screen.
2.Unplug your battery.
3.Plug in your screen.
4.Plug your device into iTunes (see if you have an image).
5.If an image appears, unplug your device from iTunes.
6.Plug your battery back in.
7.Turn your device on using the power button.
If no image appears, you have a battery that is dead or dying. In either case, your battery no longer is sending a strong enough charge to your phone to allow the screen to make an image appear. You will need to replace your battery. Should an image appear on your phone, you are ready to go. Close it up, and enjoy your device as Apple intended!
2. White Screen:
This is normally a software calibration issue. Apple devices sometimes do not want to initially accept a new part. Start with performing a soft reset on your device (hold down the top power and bottom home button until the device shuts down and reboots). If the white screen persists after the soft reset, it could be a case of your device not wanting to accept a 3rd party part all together. At this stage, your best solution will be to reassemble your device with your broken screen, and contact Apple about getting a new device all together.
3. Stress Marks:
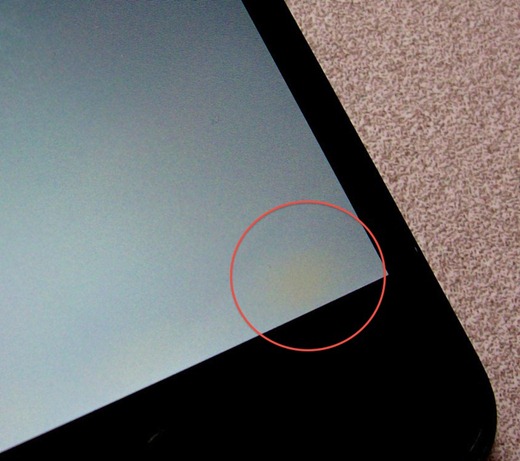
These can have several different variations. Any yellow discoloration or ink like splotches are signs of stress marks. These are caused by too much pressure being applied to the LCD. Pressure could be caused by small pieces of glass that may have been left behind from your broken screen, and they adhere to your mid-frame. Pressure can also come from placing your finger directly on the back of the LCD screen. We suggest removing the LCD assembly, and thoroughly clean the metal frame of all glass, glue, and tape. There may be some sticky 3M tape or glue residue that you will need to remove before attempting to reinstall your new screen.
These steps cover the most common questions we get regarding screen replacements. With that said, there are other issues that we see pop up that sadly, cannot be fixed by any troubleshooting. We have put together a list of some of the clear signs that you have a defective or damaged LCD. Some of these could be caused by damage during shipping, some could be damage during installation, and some happen due to a faulty part.
Clear Signs You Have A Defective Or Damaged Screen
1.) Colored lines down the the LCD: Green, yellow, red, orange, or anything else that resembles some type of pin stripping on your LCD is a clear sign that your LCD has been exposed to too much pressure.
2.) Dual images (also called "ghosting"): This can happen almost anywhere on your device: home page, inside an app, or it may show while looking at your pictures. If this is the case, try downloading your pictures, and view them on a computer. If they look clear on a PC, then your LCD screen has gone bad.
3.) No touch response, or a lack of touch in certain areas: If only certain keys will not work on your new screen, these are called dead spots. These are normally caught during quality control testing, but can sometimes not be caught if the dead spot is in the right area or techs did not touch. This is normally a sign of a defective screen, and not one that was damaged at some point. Another common touch problem is either no touch, partial touch, or a strip of icons that won't work (called blocking). To figure out what happened here, take your device apart, remove the screen, and check to see if the digitizer cable was damaged during installation. There is usually a small rip in the longer of the 2 cables at the base of the connector (gently pull back the shorter cable). There is a part where the cable widens out, and a rip can happen when you feed the digitizer cable from the front to the back of the phone.
4.) A white halo around your screen: This is caused by a flaw in the soldering of the initial screen. These are difficult to pickup prior to installation as the halo normally shows up a few days after use. The full power from your battery will cause an all ready weak solder point to further lose it's conductivity; thus causing a white halo. Screens are mass produced over seas, and these sorts of flaws just happen.
If you have any of these issues you can contact your supplier to change your screen. Here I would like to suggest a good supplier to you, that is, HCQS. They have engaged in the mobile phone parts for about 9 years and supply the best quality products all over the world.All of replacement parts are hand tested by their technicians to ensure quality and clarity prior to shipping. This process helps assure that their parts will arrive to you in perfect working condition.
Saturday, January 16, 2016
How to Fix a Stuck iPhone Home Button?
A stuck iPhone Home button will lead to a terrible user experience. The Home button is a very important button for navigating the iPhone interface. Are you suffering a stuck or unresponsive iPhone home button? Here are 3 effective methods to deal with it:
Method 1: Enabling the Alternative Home Button
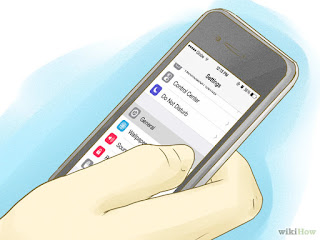
1. Open the Settings app on your Home screen. If your Home button is not working, you can add a alternative Home button to your screen that allow you to mimic the functionality of your non-working Home button.
2. Tap General. In the General menu, find the Accessibility option. Once you are in the Accessibility section, scroll down and select AssistiveTouch. Toggle the slider to ON. A new button will appear on your screen. You can drag your alternate Home button to any position on the screen that you would like.
3. Press your alternate Home button. When you press the button, you will see four options appear. You can access Siri, your Favorites, your Device settings, or press Home to mimic the Home button and return to your Home screen.
This method is available for iOS 5 and later.
Method 2: Recalibrating an Unresponsive Home Button
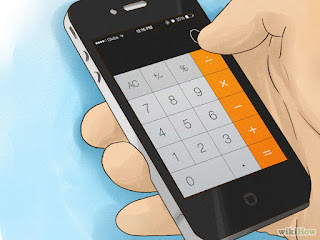
1. Open one of your default apps. These include Calculator, Calendar, Weather, etc. This method will help reset a Home button that is slow to respond, or one that doesn't respond at all and requires multiple presses to register.
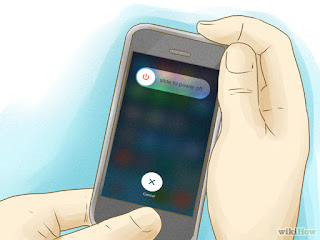
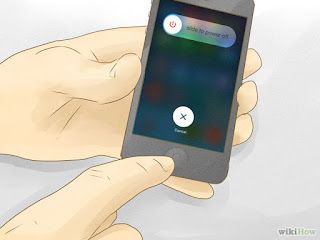
2. Hold down the Power button. After a few seconds, the "Slide to Power Off" option will appear. Release the Power button.
3. Press and hold the Home button. After a few seconds, the "Slide to Power Off" option will disappear and the app will be force-closed. This action will calibrate the Home button and restore its responsiveness.
Method 3: Fixing a Stuck Home Button
1. Use compressed air. Press and hold the Home button. Take a can of compressed air and blast the connection port at the bottom of the phone. Oftentimes this will clear out some of the gunk that may be causing the button to stick down.
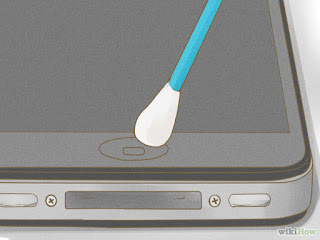
2. Use isopropyl alcohol. Drop a small amount of isopropyl alcohol onto the tip of a cotton swab. Press in the Home button as far as it goes and rub the alcohol around the edges. Press the button several times to work the alcohol into the cracks. This can help clean grime out that may be causing the button to stick.
This method may void your warranty.
Using too much alcohol can cause water damage to your phone. Only perform this fix if your phone is no longer under warranty. If it is under warranty, attempt to have it repaired by Apple first.
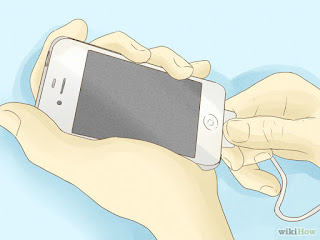
3. Readjust your connectors. Plug your charging cable into the phone. Gently push down on the connector, so that the Home button is pushed up. Press the Home button as you are pushing the connector to test if it worked.
Push gently so that you don't damage the connector or port.
4. Twist and spin. Place your iPhone on a flat surface. Press and hold the Home button firmly down, and then rotate your phone clockwise while continuing to firmly press the button. This may help reseat the button.
Friday, January 15, 2016
How to Repair Your Cracked iPod Screen
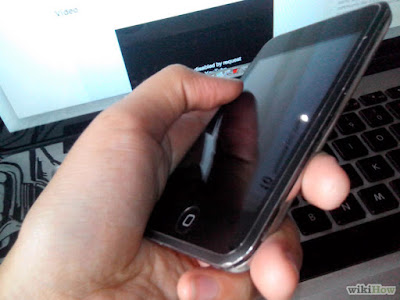
Is your cracked iPod screen driving you crazy? Are you planning to buy another iPod? In fact It's not hard to fix a broken iPod screen, and the cost can be as cheap as $50. Though this may appear to be a lot, as compared to the price of buying a new iPod, it's nearly nothing! Here are the detailed steps on how to replace a broken iPod screen easily:
1. Open the iPod case.
You need to use a plastic opening tool to wedge into the case seams and separate the panels. Take care on this step - if not done properly, the iPod case may be damaged.
2. Split the front panel from the metal back by separating the retaining clips on both sides of the iPod.
3. Lift the panel so that the iPod is completely separated. Be cautious that the antenna does not fall out.
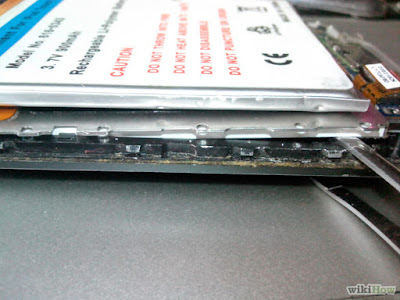
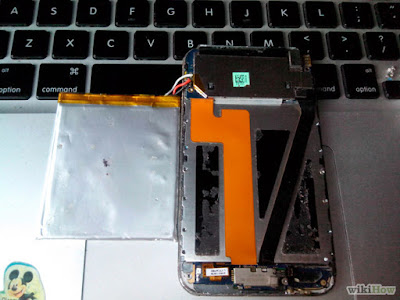
4. Pry to make the battery loose.
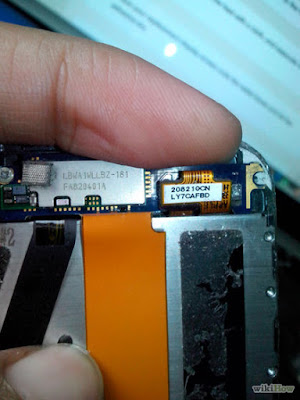
5. Remove the antenna, connector, and two Phillips screws.
6. Keep following the directions detailed in the citations, below.
7. Separate the display from the front panel, and use a heat source (like a hair dryer) to loosen the glue holding the panel to the frame.
8. Protect your hands from the heat with a cloth, and separate the display from the frame.
9. Place your new iPod screen replacement onto the metal frame and let the adhesive dry.1.
10. Reassemble your iPod.
Subscribe to:
Posts (Atom)


